Migrating from WordPress to Eleventy
16th Oct 2019
After almost 10 years of this blog being powered by WordPress, it is now a statically generated site built using Eleventy.
It's also no longer self hosted! It's now hosted on Netflify and I'm happy that this site is now one less thing for me to backup.
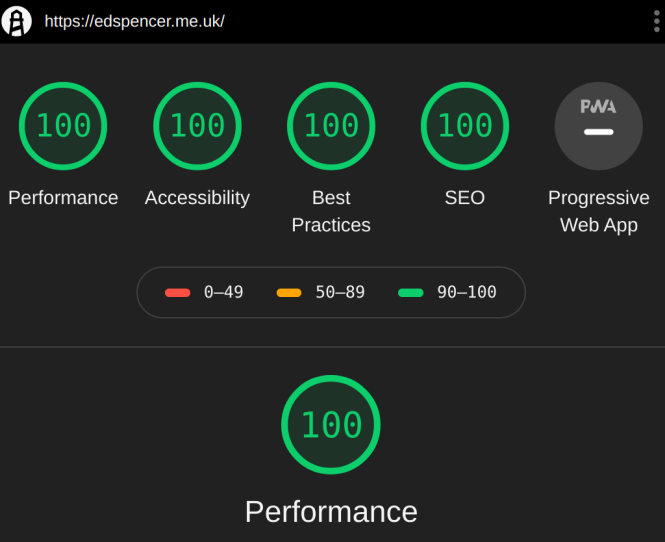
This website is now the best it's ever been:
In this post I'll outline the steps I took to migrate the blog from WordPress to Eleventy.
Why Eleventy?
I first came across Eleventy after seeing it in action on the starter kit Hylia. Eleventy piqued my interest because it is super simple to get going. You don't need to learn much at all, and the documentation is concise and practical. Essentially at build time, Eleventy will interpret markdown files and transform them into semantic html documents. You can fit templates around these, be they nunjucks, pug, or plain html.
New site setup
The first thing I did was get an empty Eleventy site generated.
mkdir mynewblog
cd mynewblog/
npm init -y
npm install @11ty/eleventy --save-dev
echo "# hello world" > index.md
All we've done here is create a folder with a singe markdown file. There isn't much going on here, so let's just go ahead and ask Eleventy to generate us a site in that folder:
npx @11ty/eleventyThe output will look like this:
Writing _site/index.html from ./index.md.
Processed 1 file in 0.06 seconds (v0.9.0)
Which tells us that Eleventy found our index.md file, processed it, and generated us an index.html file in the _site folder, which is the default output folder that Eleventy will generate html to.
So let's see how this looks in the browser:
npx @11ty/eleventy --serve This will serve out your _site folder on localhost:8080
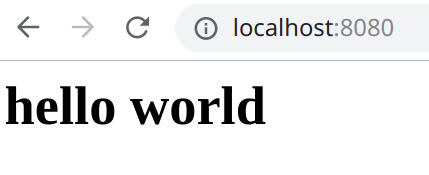
Great, so that all works!
Let's examine the _site/index.html file that Eleventy generated
<h1>hello world</h1>Eleventy has done what we've expected, but in order to make a production ready site, we're going to need to tell Eleventy about all of the html that needs to wrap the content that our markdown files contain. So let's create a new folder called _includes, and in there create a file called layout.pug:
doctype html
html(lang="en")
  head
    title My new site
    meta(name='viewport' content='width=device-width, initial-scale=1')
  body
    article
      header
        h1 !{title}
      | !{content}
_includes is a special folder that Eleventy will ignore when generating your site. If we were to put our layout.pug in the root of our site, Eleventy would generate a layout.html file for us, which we don't need.
Next, we need to tell our index.md to use the _includes/layout.pug file. Update index.md to contain the following:
---
title: "Hello world! This is the title"
date: "2019-10-16"
layout: "layout.pug"
tags: ["post"]
---

## This is a sub title
We've now added some front matter to our index.md file. Eleventy will use the front matter to build up some metadata about the file, which we can access later. We've also told Eleventy which layout file to use to transform the index.md file.
Let's ask Eleventy to build our site again:
npx @11ty/eleventyNow let's have a look at our generated page _site/index.html:
<html lang="en">

<head>
  <title>My new site</title>
  <meta name="viewport" content="width=device-width, initial-scale=1" />
</head>

<body>
  <article>
    <header>
      <h1>Hello world! This is the title</h1>
    </header>
    <h2>This is a sub title</h2>
  </article>
</body>

</html>
Great, now let's look at getting all of our posts out WordPress.
Moving content out of WordPress
We basically need a way of generating a markdown file for each of our posts in WordPress. After a brief search on GitHub, I came across this npm package. It will read your WordPress export.xml file, and generate you a markdown file for each of your posts. So here's what I did:
- Log into my WordPress admin site, and navigate to tools > export. From here you can download your export.xml file
- Clone the repo and copy your export.xml file into the same folder
- Run the following:
node index.js --addcontentimages=trueThe addcontentimages argument will fix the image paths in your generated markdown files.
You will then have an output folder that contains a folder for each of your posts, which will contain an markdown file for the content, and a folder containing the images. Here's the tree output my review of the Surface Book keyboard:
+-- 2019-04-11-surface-book-keyboard-review
│   +-- images
│   │   +-- craft-how-it-works.png
│   │   +-- logitech-craft.png
│   │   +-- surface-book-keyboard-angle-1024x499.jpg
│   │   +-- surface-book-keyboard-angle.jpg
│   │   +-- surface-book-keyboard-battery-compartment-1024x763.jpg
│   │   +-- surface-book-keyboard-battery-compartment.jpg
│   │   +-- surface-book-keyboard-numeric-1024x768.jpg
│   │   +-- surface-book-keyboard-numeric.jpg
│   │   +-- surface-book-keyboard-side-1024x813.jpg
│   │   +-- surface-book-keyboard-side.jpg
│   │   +-- surface-book-keyboard-top.jpg
│   │   +-- surface-book-keyboard-wide-angle-1024x768.jpg
│   │   \-- surface-book-keyboard-wide-angle.jpg
│   \-- index.md
Now we can copy the output folder into our new site (I'm going to copy it into a /posts folder), run Eleventy, and it'll generate us html for each of the posts.
Manual intervention may be required
We need to update each of the generated markdown files to include front matter that points to our layout file. This may be acceptable if you only have a few posts to go through, but in my case I had over a hundred, so I ended up hacking the WordPress export to markdown code so that all generated markdown files included the layout front matter.
Once the layout front matter has been set, you can ask Eleventy to re-generate your site:
npx @11ty/eleventyYou'll now get a much bigger output as Eleventy works through the blog posts in your /posts folder, and generates a set of html files for them! Go ahead an serve the new site, and have a browse around your imported content. It's worth doing this to check for any minor paragraphing fixes you can make.
And what about re-directs?
Depending on how you configured your original WordPress install, and how you asked the WordPress export to markdown package to output your files, you may have broken your old links.
In my case, my WordPress install placed content at /YYYY/MM/DD/title-slug. I don't really want to maintain a folder for the year, month, and day, so I'm instead opting to have posts at posts/YYYY-MM-DD-title-slug.
This means that a post that was located at
https://edspencer.me.uk/2019/04/11/does-the-surface-keyboard-work-with-ubuntu-yes-but-only-with-ubuntu-18-onwardsWill now be located at
https://edspencer.me.uk/posts/2019-04-11-does-the-surface-keyboard-work-with-ubuntu-yes-but-only-with-ubuntu-18-onwardsRedirection is not a concern for Eleventy. Eleventy also runs a build time, not runtime, so its simply not in the place to deal with the redirects anyway.
So, wherever you're going to host your updated site, you need to deal with the re-directs. I decided to host the new Eleventy generated site on Netflify as:
- It's free for my needs
- Is served over https by default
- Is served over http/2 by default
- Setting up automated deployments is trivial
Netlify supports all forms of re-direction simply by including a _redirects file in the root of your site. This file contains a list of route pairs, with the route first and the new route second:
/2019/04/11/does-the-surface-keyboard-work-with-ubuntu-yes-but-only-with-ubuntu-18-onwards /posts/2019-04-11-does-the-surface-keyboard-work-with-ubuntu-yes-but-only-with-ubuntu-18-onwardsHere I haven't specified the redirect HTTP status code, which on Netflify will default to 301 - Moved permanently. You can read more about Netlify redirects here.
We also need to get the new _redirects file into our site folder. I used an npm script for this and did a simple file copy. In package.json:
  "scripts": {
    "build": "npx @11ty/eleventy && npm run copy-redirects",
    "copy-redirects": "cp _redirects _site/_redirects"
  },
So now, running npm run build will compile the site using Eleventy, and will then copy the _redirects file into the right place.
Now, you just need to automate your deployments. If you host your site in GitHub, connecting your deployments can be done by following these steps.
If you run a self hosted git instance elsewhere (like I do), you can follow these steps.
The quick version is that you need to:
- Build the site
- Upload the contents of your _site folder to Netlify
And what about comments?
I've decided not to bring the comments over from my old blog. There really weren't many comments of value - the only useful ones were on a post I made about using your own router with BT Internet, where plenty of BT Internet users exchanged tips on how they got it working.
The others were of low value and were just another thing to moderate. If you really want comments, I'd recommend webmentions over a 3rd party service like Disqus, which you really shouldn't add to your site as it'll start bloating it with 3rd party JavaScript and cookies.
And what about my nice WordPress text editor?
I'm living without the WordPress text editor. I'm happy to write markdown (actually, I prefer it) as it keeps me in the text editor. If you want a rich text editor, you could use a dedicated markdown editor locally, or plug in a cms that will commit to source control, like Netlify CMS.
Et voilà!
And that's it! WordPress isn't a bad platform - it's an excellent enabler. It lets people that are not web developers get something onto the web. Let's not be gatekeepers!
The downsides of WordPress are mainly control, maintenance and performance (which I've blogged about in the past). Having a site built with Eleventy allows you to be superlean and have a rapid, lightweight site that is a joy to use and that you are proud of.